Posts

Showing posts from February, 2019

Two months "anniversary" and progress on elevator

Image
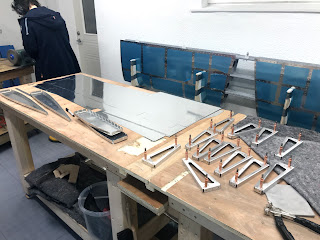
Two months has passed since starting, and approx. 160 hours spent building plus another 10-15 on workshop etc. The progress on the elevator has been good this week. Page 09-08 step 6 was completed today, but as I didn't understand how to sand/adjust the trailing edge cross section to fit the fairing, I decided to prepare the fairings in chapter 12 before proceeding. Finding and preparing all the parts. The tip ribs for both side assembled and match/final drilled. Foam blocks are used as ribs. The templates from the manual are just glued on with spray clue. First two ribs cut. Very easy with a band saw. The left elevator side has a trim tab, so the top and bottom skin has a flange that needs to be bent 90 degree so they mates together. The piano hinge for the trim tab on the elevator is drilled.  I used a caliper to adjust the hinge parallel to the flange every 12-15 cm. This is the area were the electric trim motor will be installed. It will be a...

Horizontal stabilizer finished!

Image
Today I set last rivets on the horizontal stabilizer - it feels good😊 Total build ended on 63:15. That is inclusive some help. No onto the elevator. The middle section riveted together. Front and back spar clecoed together with the middle section just to check that everything is ok. A lot of holes to dimple in the skins. I was a bit afraid that it could be difficult to reach the holes near the leading edge, but that was no problem at all. The skins onto their cradles to have the HS-905 nose ribs riveted in place. It was a bit difficult and I have to drill out a couple.  By using tape I "tweak" the bucking bar for the different tasks, setting rivets becomes much easier, and you avoid scratches on surround parts. Everything set up for riveting the front spar. I made the cradles quite high so they could stand on the floor instead of the work bench. The 2 inboard nose ribs (HS-905) was the last rivets to set. All done. And stored. ...

Rudder leading edge fix and horizontal stabilizer progress

Image
This weekend I fixed the rudder leading edge and continued priming and assembling the horizontal stabilizer. Rudder fix I was not satisfied with the leading edge curve on the lower part of the rudder. So I decided to try to fix it by applying pressure evenly and then use a hammer to bend it slightly down. I used a piece of wood with a groove in the middle to try to beetle it down and widen the curve a bit. I also added some heat with a heat gun. Looks better. I also hang the rudder on the VS. It fit perfectly😊  Horizontal stabilizer Preparing the skins for priming. The edges are deburred using the tooth file , 120 grit sanding paper and then finished with scotch brite pad on a block. Both skins ready in the spray booth. I also etched and primed the training airfoil, as I've ordered some Eko Poly paint samples from Stewart Systems together with a new batch of primer. I'll test 4 light colors to see if I can decide the base color the plane, an...

Rudder completed and horizontal stabilizer primed

Image
The rudder is now completed after that the tape for the trailing edge finally arrived. Priming of the structure parts on the horizontal stabilizer i also done. The skins will not be primed before next weekend due work. Rudder Right and left skin joined. The lower aft rivets are on a tight space, and the trailing edge has to be peeled slightly. It's important to do the aft rivets in the skin at the 07-10 step 2. The manual is not 100% clear on this. The counter weight in place. Trailing edge complete! Less than 1 mm deviation alongside😀  The back side (shop side) turned out very nice using the pneumatic squeezer with the modified set from Cleaveland. Leading edge rolled. I managed to do a blunder setting 7 rivets of the wrong type😣 They were a bit hard to remove, but I managed it in the end.   The rudder! But I'm not 100% pleased. The curve is not following the template on the lower section. I'll contact Vans support to get their...