Posts

Showing posts from 2019

1 year anniversary!

Image
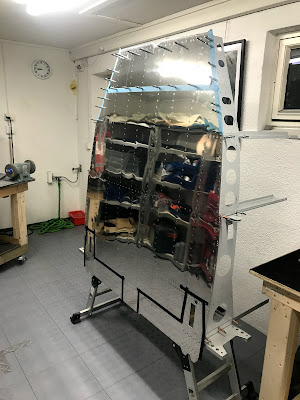
One year has passed😀 Total time spent on building ended on 625. Hopefully I will manage at least the same hours the next year. Many hours was lost during the summer when preparing and refurbishing a container for storage. Some weeks was also lost while waiting for the fuse and finish kit to arrive. The section I'm working on now is the last before joining the forward and aft fuselage. I'm quite sure that will happen during the first week of January, or at least before February. But I'll not hurry on, and plans to prepare the aft fuselage for autopilot servo attachments and GPS antenna, before attaching.

Section 29 progress

Image
I've completed section 29-02 to 29-07 and is working on 29-08 (attaching the skin and cowling). In addition parts have been deburred and primed ahead.  The control column assembly is in place. It took some time to get the shims correctly. Lower logeron were the engine mount will be attached. The upper longeron must be twisted 10 degree. Parts primed but needed some touch up. I decided to fabricate a trolley with wheel, to easily be able to move the fuselage in and out of the container. I also made a ramp (not shown on the picture) The left side skin is hang on.

Start of section 29 Forward fuselage side structure

Image
I've started on section 29, and it seems like a comprehensive but exciting section. Quite quickly the two forward fuselage section comes together.

Section 28 Forward fuse lowe structure completed

Image
Section 28 is finished. Time used 41.

Section 27 firewall completed

Image
Section 27 Firewall was completed today. 28 hours used. This is section 27 Firewall. All parts. The aluminium parts. To back rivet the holes in the middle of the firewall, my back rivet plate was to large. So I used the tungsten bucking bar instead with some tape to hold it in place. That worked very well. I was a bit worried of how messy the tank sealing would become, and decided to use tape below the top firewall skin. No problem then. I used the 2Oz Chemseal B2 Tank Sealant Cs3204 from Aircraft Spruce. I think the consistency was better than the one I purchased from Vans Aircraft for the elevator.   One have to be creative to set all rivets alone. All done. The remaining clecoes sits in the holes where the battery box til sit.

Section 26 completed

Image
Today the last rivet on the mid fuselage lower structure was set. Total time 74 hours + 4-5 hours riveting and etching help. All done😀 Quite many rivets on the skin, but with good help (wife) it went smooth. The holes on the blue tape and above will be set when the tail cone i joined.  Back riveting with my new long back rivet set ( Cleaveland ). It's easier with a long set to keep it perpendicular to the part. Some new tools and supplies arrived from Aircraft Spruce. Tank sealant (for next section), more etching fluid, park brake valve, wire stripper, thread sealant, tool (pliers) for clamp installation +++ This tools is for installation of washer in tight spots I attached the whole structure to a ramp. Worked out very well during rivet bucking. Sub-structures ready to be attached. As had to wait to get bucking help, I started on the section 27-Firewall.

Section 26 progress

Image
Good progress on section 26. Every parts and skins is now primed and most of the structures are finished. Next now is to rivet everything together. Total time spent so far is 54 hours. Etching in progress with happy wife😁  First bunch of parts sprayed. Baggage ribs. Aft center section ribs. This is called Crotch Strap Assembly. Both Crotch Strap Assemblies completed. The outboard seat and baggage ribs has to be fluted because it's curved.  Quite easy as long as the instruction are followed (start in front). Start of section 26-07.  Section 26-07 to 26-09 completed. PS! It's important that the two out most ribs (F-01415) are clecoed correctly on the F-01404 bulkhead (inside of it). It might be difficult to fix later. This was something I read on another blog, and found that I had done it wrong initially. Peeling the plastic from the bottom skin. A broomstick works very well. I had the center bottom skin in...