Posts

Paint booth

Image
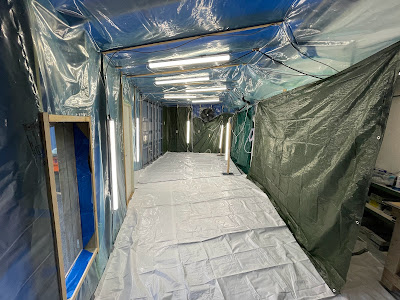
The paint booth is now set up, and I primed the top cowling, empennage fairing and the oil door just to check that it's working. It does, but the outside temperature has been around 10-12C, so I have to use a propane heater. Next is to try the top coat on the same parts (Stewarts Systems EcoCrylic).

Tail fairing and final work

Image
The empennage fairing had to be completed, so I did install all the tail surfaces and did the final adjustments.

More engine stuff - oil cooler, cowl baffle, air filter etc.

Image
 After 2 weeks on holiday I proceeded with more engine related items. The backup alternator had to be installed. I decided to remove the right mag to get access to the difficult lower left bolt. At the same time I rotated the mag a bit more clockwise, to have access to the electrical connector on the mag. Also the oil cooler, air filter and baffle has ben completed. The backup alternator (B&C BC410-H) is a bit difficult to get attached because the nut on the lower left side is very difficult to get access to. Removing the mag made it easy.  The picture show after the mag is back in. The oil return tube had to be modified slightly to not interfere with the Snorkel.  The alternate air emergency door.

Gear leg and wheel fairings and oil door

Image
Most of the fairing works is now done, and I'm leaving for 2 weeks holiday. When back I'll complete the rest of the work on the firewall forward and then start on the paint job. The paint should arrive in beginning of July, and the ventilation fan and filters about the same time. Oil door I decided to convert the oil door supplied,  to use a spring loaded  hinge with a Cessna latch.  I got the  hinge  and latch (KM610-64)  from Aircraft Spruce.

Cowling and engine

Image
The cowling is now in fitted and only some minor works remains.  Since last post all engine wiring and plumbing is 90% done, and as the cowling is now fitted, I'm ready to install the baffling, backup alternator and exhaust.   Skybolt locks are used on the top cowl. The lower cowl  is using the standard Vans piano hinge method. Vans recommend to not install the propeller while fitting the cowling. They have recommended way to simulate the propeller in this document .  Instead of cutting pipes, I 3D printed the spacers. I event 3D printed the bolts😁

Engine installed

Image
I was a bit excited about hanging then engine - but it was nothing to worry about. It took me roughly 3 hours alone. Basically I had the engine hanging in the lift and moved the fuselage.